Ngurus Internet tambah ribet barusan ada emai ttg Cache DNS Poisoning dan ada satu link yang menarik utk melakukan pengecekkan apakah DNS kita jelek atau bagus, linknya tinggal di klik dibawah ini:
http://entropy.dns-oarc.net/test/
DNS ku masih kurang bagus hiks, nambahin kerjaan aja tar deh aku coba cari caranya supaya jadi GREAT semua
PT. Hawk Teknologi Solusi

Silahkan Cari Disini

Jumat, 25 Juli 2008
Rabu, 16 Juli 2008
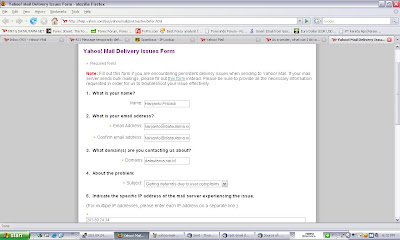
Jika Email server di tolak oleh Yahoo.com
Jika email-email dari email server kita di tolak oleh yahoo coba cek dulu log filenya
contoh
2008-07-16 18:31:24 1KJ2wt-0005K6-M5 SMTP error from remote mail server after initial connection: host a.mx.mail.yahoo.com [209.191.118.103]: 421 Message from (203.89.24.34) temporarily deferred - 4.16.50. Please refer to http://help.yahoo.com/help/us/mail/defer/defer-06.html
maka coba buka http://help.yahoo.com/help/us/mail/defer/defer-06.html
dengan browser
 lalu pilih:
If your mail server does not primarily send bulk mailings (e.g., you run a personal, corporate, educational, or ISP mail server), please fill out this form instead.
Isilah form itu dengan data-data yang diminta

 Lalu send
 Kemudian kita akan menerima email dari abuse-admin@cc.yahoo-inc.com
yang isinya:
subject: Auto Confirmation - Your Yahoo! Mail support request was received (KMM74480709V8183L0KM)
Selain itu kalau email yang kita kirim ke yahoo masuk ke bulk coba isi form berikut:
http://help.yahoo.com/l/us/yahoo/mail/postmaster/bulk.html

semoga yahoo bisa menerima email-email dari email server kita
Jangan lupa juga cek di http://www.spamhaus.org/query/bl?ip=203.89.24.34
dengan mengisi ip = ip address email server kita
kalau terblacklist lakukan release

contoh
2008-07-16 18:31:24 1KJ2wt-0005K6-M5 SMTP error from remote mail server after initial connection: host a.mx.mail.yahoo.com [209.191.118.103]: 421 Message from (203.89.24.34) temporarily deferred - 4.16.50. Please refer to http://help.yahoo.com/help/us/mail/defer/defer-06.html
maka coba buka http://help.yahoo.com/help/us/mail/defer/defer-06.html
dengan browser
 lalu pilih:
If your mail server does not primarily send bulk mailings (e.g., you run a personal, corporate, educational, or ISP mail server), please fill out this form instead.
Isilah form itu dengan data-data yang diminta


 Lalu send
 Kemudian kita akan menerima email dari abuse-admin@cc.yahoo-inc.com
yang isinya:
subject: Auto Confirmation - Your Yahoo! Mail support request was received (KMM74480709V8183L0KM)
Hello,

This is an automated message regarding your recent request for Yahoo!
Mail Customer Care support. We have received your message and will
respond within the next 48 hours with an answer.

Thank you for reaching out to us. We look forward to helping you!

Sincerely,

Yahoo! Customer Care


**Please do not respond to this message as no one will receive it.
Selain itu kalau email yang kita kirim ke yahoo masuk ke bulk coba isi form berikut:
http://help.yahoo.com/l/us/yahoo/mail/postmaster/bulk.html

semoga yahoo bisa menerima email-email dari email server kita
Jangan lupa juga cek di http://www.spamhaus.org/query/bl?ip=203.89.24.34
dengan mengisi ip = ip address email server kita
kalau terblacklist lakukan release

Selasa, 15 Juli 2008
WARNING ARP Spoof mengancam Jaringan
Barusan salah satu klient di gedung maspion bermasalah setelah di selidiki dengan seksama coba perhatikan gambar dibawah ini:

Perhatikan bagian yang di sorot: ip 192.168.0.64 yang merupakan ip notebook support pada saat link ke ancol di enable mac nya menjadi 00:13:8F:02:E0:64, juga untuk ip 192.168.0.1 , 192.168.0.2 dst. Aneh bukan satu mac dimiliki banyak IP, jika itu ip alias mungking-mungkin saja tetapi begitu link ancol didisable lihat gambar dibawah

IP 192.168.0.64 memiliki MAC= 00:03:47:8B:DF:B9 nah loh! dan pada saat link ancol didisable LAN menjadi normal .
Sebelumnya sudah saya announce ke support jakarta ada virus baru yang memanipulasi arp table http://vaksin.com/2008/0608/microsoft2/arp-spoofing.html
Nah loh gimana cara atasinya, menurut vaksin.com cukup dengan menstatiskan table ip dan mac nya satu satu di router dan di komputer :( selamat deh
Selasa, 08 Juli 2008
Flush cache dns di hosting cpanel
Kadang kalau saya rubah zone file di nameserver hosting cache yang lama selalu saja tidak mau hilang beruntung saya menemukan artikel ini:
http://www.linuxquestions.org/questions/linux-networking-3/display-and-flush-dns-cache-303314/
Hello,
I have a computer assignment and I need the right command in linux. I need to display recent DNS records and clear them whenever I want. In windows "ipconfig /displaydns" and "ipconfig /flushdns" commands are used respectively. Are there any commands in linux which are equivalent to these ones? or in Linux isn't there such an option? Can "ifconfig" solve this problem? If yes what should be the exact options and command line?
Hello,
to flush the DNS I use "/etc/init.d/nscd restart"
Panduan singkat penggunaan Postfixadmin
Panduan singkat Postfix Admin
Untuk login sebagai admin
http://ipserver

Login: admin pass admin (atau disesuaikan dengan username dan pass yang ada)

Seorang admin bisa membuat mailbox dengan cara klik Add Mailbox dan pilih pada domain mana user tersebut akan dibuat

Untuk melihat secara keseluruhan klik Overview maka akan ditampilkan list domain yang di manage oleh postfixadmin

Jika salah satu domain di klik akan ditampilkan detail mailbox yang ada

Untuk merubah password user, auto respond / vacation, dan auto forward bisa ke
http://ipserver
Login dengan alamat email user dan password email ybs

Maka akan tampil menu diatas
Autoresponse utk feedback otomatis kalau ybs sedang berlibur misalnya
Change forward utk merubah auto forward ke alamat emaillainnya

Diatas adalah contoh auto response, isi surat bisa diedit sesuai selera
Kemudian klik Going Away, utk menonaktifkn auto response klik lagi menu auto response dan klik going back

Untuk forward bisa diisi alamat email yang dijadikan forwarding
Kemudianklik Edit Alias

Untuk merubah password klik Change password
Email Server Postfix dengan Postfixadmin
Berikut adalah step-by-step pembuatan Email Server berbasis Postfix dengan postfixadmin
Referensi yang saya baca adalah dari:
https://help.ubuntu.com/community/PostfixCompleteVirtualMailSystemHowto
http://workaround.org/articles/ispmail-sarge/index.shtml.en
http://www.purplehat.org/?page_id=11
Distro yang digunakan adalah Debian 4.0 rc3
Step 1
Install debian menggunakan netinst cd
Step 2
remove exim4 yang merupakan MTA standar bawaan debian
Step3
Install postfix:
#apt-get install postfix
pada saat proses install pilih "Internet Site"
Step4
Install Mysql map support untuk Postfix
#apt-get install postfix-mysql
#apt-get install mysq-client
#apt-get install mysql-server
Step5
Install Paket-paket untuk Client Access dan Authentication
#apt-get install courier-authdaemon
#apt-get install courier-authlib-mysql
#apt-get install courier-pop
pada saat proses install pilih "create directories for web-based administration = No"
#apt-get install courier-webadmin
pada saat proses install pilih "Activated CGI Program = No"
Password courier administration, misal = 123456
#apt-get install courier-pop-ssl
#apt-get install courier-imap
#apt-get install courier-imap-ssl
Step 6
Install Paket-paket untuk SMTP authentication
#apt-get install postfix-tls
#apt-get install libsasl2
#apt-get install libsasl2-modules
#apt-get install libsasl2-modules-sql
#apt-get install openssl
"Jangan lupa buat SSL Certificate untuk TLS to encrypt SMTP traffic"
Install php module
#apt-get install php4
#apt-get install php4-mysql
#apt-get install php4-pear
Install antivirus dan antispam
#apt-get install amavis
#apt-get install clamav
#apt-get install clamav-daemon
#apt-get install spamassassin
Step 7
Setting Mysql Backend
Setting password root mysql, misal mysql123456
#mysqladmin -u root password mysql123456
Step 8
Setting Mysql Database
#mysql -u root -p
password: mysql123456
mysql> CREATE DATABASE postifx;
mysql> GRANT SELECT ON postfix.* TO postfix@localhost IDENTIFIED BY 'post123456';
mysql> GRANT SELECT, INSERT, DELETE, UPDATE ON postfix.* TO postfixadmin@localhost IDENTIFIED by 'postadmin123456'
mysql> flush privileges;
mysql> quit;
catatan: command disebelah kanan mysql> ditulis perbaris
Untuk membuat table dalam database postfix salin script sql berikut, misal sebagai file postfix.sql
-- MySQL dump 10.11
--
-- Host: localhost Database: postfix
-- ------------------------------------------------------
-- Server version 5.0.32-Debian_7etch4-log
/*!40101 SET @OLD_CHARACTER_SET_CLIENT=@@CHARACTER_SET_CLIENT */;
/*!40101 SET @OLD_CHARACTER_SET_RESULTS=@@CHARACTER_SET_RESULTS */;
/*!40101 SET @OLD_COLLATION_CONNECTION=@@COLLATION_CONNECTION */;
/*!40101 SET NAMES utf8 */;
/*!40103 SET @OLD_TIME_ZONE=@@TIME_ZONE */;
/*!40103 SET TIME_ZONE='+00:00' */;
/*!40014 SET @OLD_UNIQUE_CHECKS=@@UNIQUE_CHECKS, UNIQUE_CHECKS=0 */;
/*!40014 SET @OLD_FOREIGN_KEY_CHECKS=@@FOREIGN_KEY_CHECKS, FOREIGN_KEY_CHECKS=0 */;
/*!40101 SET @OLD_SQL_MODE=@@SQL_MODE, SQL_MODE='NO_AUTO_VALUE_ON_ZERO' */;
/*!40111 SET @OLD_SQL_NOTES=@@SQL_NOTES, SQL_NOTES=0 */;
--
-- Table structure for table `admin`
--
DROP TABLE IF EXISTS `admin`;
CREATE TABLE `admin` (
`username` varchar(255) NOT NULL default '',
`password` varchar(255) NOT NULL default '',
`created` datetime NOT NULL default '0000-00-00 00:00:00',
`modified` datetime NOT NULL default '0000-00-00 00:00:00',
`active` tinyint(1) NOT NULL default '1',
PRIMARY KEY (`username`),
KEY `username` (`username`)
) ENGINE=MyISAM DEFAULT CHARSET=latin1 COMMENT='Postfix Admin - Virtual Admins';
--
-- Table structure for table `alias`
--
DROP TABLE IF EXISTS `alias`;
CREATE TABLE `alias` (
`address` varchar(255) NOT NULL default '',
`goto` text NOT NULL,
`domain` varchar(255) NOT NULL default '',
`created` datetime NOT NULL default '0000-00-00 00:00:00',
`modified` datetime NOT NULL default '0000-00-00 00:00:00',
`active` tinyint(1) NOT NULL default '1',
PRIMARY KEY (`address`),
KEY `address` (`address`)
) ENGINE=MyISAM DEFAULT CHARSET=latin1 COMMENT='Postfix Admin - Virtual Aliases';
--
-- Table structure for table `domain`
--
DROP TABLE IF EXISTS `domain`;
CREATE TABLE `domain` (
`domain` varchar(255) NOT NULL default '',
`description` varchar(255) NOT NULL default '',
`aliases` int(10) NOT NULL default '0',
`mailboxes` int(10) NOT NULL default '0',
`maxquota` int(10) NOT NULL default '0',
`transport` varchar(255) default NULL,
`backupmx` tinyint(1) NOT NULL default '0',
`created` datetime NOT NULL default '0000-00-00 00:00:00',
`modified` datetime NOT NULL default '0000-00-00 00:00:00',
`active` tinyint(1) NOT NULL default '1',
PRIMARY KEY (`domain`),
KEY `domain` (`domain`)
) ENGINE=MyISAM DEFAULT CHARSET=latin1 COMMENT='Postfix Admin - Virtual Domains';
--
-- Table structure for table `domain_admins`
--
DROP TABLE IF EXISTS `domain_admins`;
CREATE TABLE `domain_admins` (
`username` varchar(255) NOT NULL default '',
`domain` varchar(255) NOT NULL default '',
`created` datetime NOT NULL default '0000-00-00 00:00:00',
`active` tinyint(1) NOT NULL default '1',
KEY `username` (`username`)
) ENGINE=MyISAM DEFAULT CHARSET=latin1 COMMENT='Postfix Admin - Domain Admins';
--
-- Table structure for table `log`
--
DROP TABLE IF EXISTS `log`;
CREATE TABLE `log` (
`timestamp` datetime NOT NULL default '0000-00-00 00:00:00',
`username` varchar(255) NOT NULL default '',
`domain` varchar(255) NOT NULL default '',
`action` varchar(255) NOT NULL default '',
`data` varchar(255) NOT NULL default '',
KEY `timestamp` (`timestamp`)
) ENGINE=MyISAM DEFAULT CHARSET=latin1 COMMENT='Postfix Admin - Log';
--
-- Table structure for table `mailbox`
--
DROP TABLE IF EXISTS `mailbox`;
CREATE TABLE `mailbox` (
`username` varchar(255) NOT NULL default '',
`password` varchar(255) NOT NULL default '',
`name` varchar(255) NOT NULL default '',
`maildir` varchar(255) NOT NULL default '',
`quota` int(10) NOT NULL default '0',
`domain` varchar(255) NOT NULL default '',
`created` datetime NOT NULL default '0000-00-00 00:00:00',
`modified` datetime NOT NULL default '0000-00-00 00:00:00',
`active` tinyint(1) NOT NULL default '1',
PRIMARY KEY (`username`),
KEY `username` (`username`)
) ENGINE=MyISAM DEFAULT CHARSET=latin1 COMMENT='Postfix Admin - Virtual Mailboxes';
--
-- Table structure for table `vacation`
--
DROP TABLE IF EXISTS `vacation`;
CREATE TABLE `vacation` (
`email` varchar(255) NOT NULL default '',
`subject` varchar(255) NOT NULL default '',
`body` text NOT NULL,
`cache` text NOT NULL,
`domain` varchar(255) NOT NULL default '',
`created` datetime NOT NULL default '0000-00-00 00:00:00',
`active` tinyint(1) NOT NULL default '1',
PRIMARY KEY (`email`),
KEY `email` (`email`)
) ENGINE=MyISAM DEFAULT CHARSET=latin1 COMMENT='Postfix Admin - Virtual Vacation';
/*!40103 SET TIME_ZONE=@OLD_TIME_ZONE */;
/*!40101 SET SQL_MODE=@OLD_SQL_MODE */;
/*!40014 SET FOREIGN_KEY_CHECKS=@OLD_FOREIGN_KEY_CHECKS */;
/*!40014 SET UNIQUE_CHECKS=@OLD_UNIQUE_CHECKS */;
/*!40101 SET CHARACTER_SET_CLIENT=@OLD_CHARACTER_SET_CLIENT */;
/*!40101 SET CHARACTER_SET_RESULTS=@OLD_CHARACTER_SET_RESULTS */;
/*!40101 SET COLLATION_CONNECTION=@OLD_COLLATION_CONNECTION */;
/*!40111 SET SQL_NOTES=@OLD_SQL_NOTES */;
-- Dump completed on 2008-07-07 9:12:19
kemudian ketik
#mysql -u root -p postifx < size="2">
user = postfix
password = post123456
hosts = 127.0.0.1
dbname = postfix
table = alias
select_field = goto
where_field = address
Script "mysql_virtual_domains_maps.cf
#nano /etc/postfix/mysql_virtual_domains_maps.cf
lalu salin code dibawah ini
user = postfix
password = post123456
hosts = 127.0.0.1
dbname = postfix
table = domain
select_field = domain
where_field = domain
#additional_conditions = and backupmx = '0' and active = '1'
Script "mysql_virtual_mailbox_maps.cf"
#nano /etc/postfix/mysql_virtual_mailbox_maps.cf
lalu salin code dibawah ini
user = postfix
password = post123456
hosts = 127.0.0.1
dbname = postfix
table = mailbox
#select_field = maildir
select_field = CONCAT(SUBSTRING_INDEX(Username,'@',-1),'/',SUBSTRING_INDEX(Username,'@',1),'/')
where_field = username
#additional_conditions = and active = '1'
Script "mysql_virtual_mailbox_limit_maps.cf"
#nano /etc/postfix/mysql_virtual_mailbox_limit_maps.cf
lalu salin code dibawah ini
user = postfix
password = post123456
hosts = 127.0.0.1
dbname = postfix
table = mailbox
select_field = quota
where_field = username
#additional_conditions = and active = '1'
Script "mysql_relay_domains_maps.cf"
#nano /etc/postfix/mysql_relay_domains_maps.c
lalu salin code dibawah ini
user = postfix
password = post123456
hosts = 127.0.0.1
dbname = postfix
table = domain
select_field = domain
where_field = domain
additional_conditions = and backupmx = '1'
Untuk keamanan rubah group dan file permission dari file-file diatas dengan cara:
#chgrp postfix /etc/postfix/mysql_*.cf
#chmod 640 /etc/postfix/mysql_*.cf
Step 10
Buat vlmail user
Dengan system ini maka mailbox user akan disimpan di MySQL database dan di /home/vmail
sehingga user-user email tidak perlu memiliki UID sendiri di /etc/passwd untuk itu perlu dibuat user vmai.
#groupadd -g 5000 vmail
#useradd -m -g vmail -u 5000 -d /home/vmail -s /bin/bash vmail
Step 11
Konfigurasi Postfix dengan Mysql maps
berikut adalah contoh file /etc/postfix/main.cf yang saya gunakan
# See /usr/share/postfix/main.cf.dist for a commented, more complete version
# Debian specific: Specifying a file name will cause the first
# line of that file to be used as the name. The Debian default
# is /etc/mailname.
#myorigin = /etc/mailname
smtpd_banner = $myhostname ESMTP $mail_name (Debian/GNU)
biff = no
# appending .domain is the MUA's job.
append_dot_mydomain = no
# Uncomment the next line to generate "delayed mail" warnings
#delay_warning_time = 4h
# TLS parameters
smtpd_tls_cert_file=/etc/ssl/certs/ssl-cert-snakeoil.pem
smtpd_tls_key_file=/etc/ssl/private/ssl-cert-snakeoil.key
smtpd_use_tls=yes
smtpd_tls_session_cache_database = btree:${queue_directory}/smtpd_scache
smtp_tls_session_cache_database = btree:${queue_directory}/smtp_scache
# See /usr/share/doc/postfix/TLS_README.gz in the postfix-doc package for
# information on enabling SSL in the smtp client.
myhostname = email.javathebest.com
alias_maps = hash:/etc/aliases
myorigin = /etc/mailname
mydestination = email.javathebest.com, localhost.javathebest.com, localhost
relayhost =
mynetworks = 127.0.0.0/8, 10.19.2.0/24, 10.19.3.0/24, 222.124.20.192/29, 192.168.2.0/24
mailbox_command = procmail -a "$EXTENSION"
mailbox_size_limit = 0
recipient_delimiter = +
inet_interfaces = all
virtual_alias_maps = mysql:/etc/postfix/mysql_virtual_alias_maps.cf
virtual_mailbox_domains = mysql:/etc/postfix/mysql_virtual_domains_maps.cf
virtual_mailbox_maps = mysql:/etc/postfix/mysql_virtual_mailbox_maps.cf
virtual_mailbox_base = /home/vmail
virtual_uid_maps = static:5000
virtual_gid_maps = static:5000
#Additional for quota support
virtual_create_maildirsize = yes
virtual_mailbox_extended = yes
virtual_mailbox_limit_maps = mysql:/etc/postfix/mysql_virtual_mailbox_limit_maps.cf
virtual_mailbox_limit_override = yes
virtual_maildir_limit_message = Sorry, the your maildir has overdrawn your diskspace quota, please free up some of space of your mailbox try again.
virtual_overquota_bounce = yes
smtpd_sasl_auth_enable = yes
broken_sasl_auth_clients = yes
smtpd_recipient_restrictions = permit_mynetworks, permit_sasl_authenticated, reject_unauth_destination
smtpd_tls_cert_file = /etc/postfix/smtpd.cert
smtpd_tls_key_file = /etc/postfix/smtpd.key
transport_maps = hash:/etc/postfix/transport
#Amavis
content_filter = amavis:[127.0.0.1]:10024
receive_override_options = no_address_mappings
#tambahan konfigurasi utk lebih aman
strict_rfc821_envelopes = yes
disable_vrfy_command = yes
smtpd_delay_reject = yes
smtpd_helo_required = yes
smtpd_client_restrictions =
smtpd_sender_restrictions =
permit_sasl_authenticated,
permit_mynetworks,
reject_non_fqdn_sender,
reject_unknown_sender_domain,
permit
maps_rbl_domains = relays.ordb.org,
bl.spamcop.net,
list.dsbl.org,
sbl-xbl.spamhaus.org
smtpd_recipient_restrictions =
reject_unauth_pipelining,
reject_non_fqdn_recipient,
reject_unknown_recipient_domain,
reject_unknown_sender_domain,
#localonly
# check_sender_access hash:/etc/postfix/restricted_senders
#localonly
permit_mynetworks,
permit_sasl_authenticated,
reject_unauth_destination,
# reject_maps_rbl,
# reject_rbl_client relays.ordb.org,
reject_rbl_client list.dsbl.org,
reject_rbl_client sbl-xbl.spamhaus.org,
permit
#localonly
#smtpd_restriction_classes = local_only
#local_only =
# check_recipient_access hash:/etc/postfix/local_domains, reject
#localonly
dan berikut adalah contoh file /etc/postfix/master.cf
#
# Postfix master process configuration file. For details on the format
# of the file, see the master(5) manual page (command: "man 5 master").
#
# ==========================================================================
# service type private unpriv chroot wakeup maxproc command + args
# (yes) (yes) (yes) (never) (100)
# ==========================================================================
smtp inet n - - - - smtpd
#submission inet n - - - - smtpd
# -o smtpd_enforce_tls=yes
# -o smtpd_sasl_auth_enable=yes
# -o smtpd_client_restrictions=permit_sasl_authenticated,reject
#smtps inet n - - - - smtpd
# -o smtpd_tls_wrappermode=yes
# -o smtpd_sasl_auth_enable=yes
# -o smtpd_client_restrictions=permit_sasl_authenticated,reject
#628 inet n - - - - qmqpd
pickup fifo n - - 60 1 pickup
cleanup unix n - - - 0 cleanup
qmgr fifo n - n 300 1 qmgr
#qmgr fifo n - - 300 1 oqmgr
tlsmgr unix - - - 1000? 1 tlsmgr
rewrite unix - - - - - trivial-rewrite
bounce unix - - - - 0 bounce
defer unix - - - - 0 bounce
trace unix - - - - 0 bounce
verify unix - - - - 1 verify
flush unix n - - 1000? 0 flush
proxymap unix - - n - - proxymap
smtp unix - - - - - smtp
# When relaying mail as backup MX, disable fallback_relay to avoid MX loops
relay unix - - - - - smtp
-o fallback_relay=
# -o smtp_helo_timeout=5 -o smtp_connect_timeout=5
showq unix n - - - - showq
error unix - - - - - error
discard unix - - - - - discard
local unix - n n - - local
virtual unix - n n - - virtual
lmtp unix - - - - - lmtp
anvil unix - - - - 1 anvil
scache unix - - - - 1 scache
#
# ====================================================================
# Interfaces to non-Postfix software. Be sure to examine the manual
# pages of the non-Postfix software to find out what options it wants.
#
# Many of the following services use the Postfix pipe(8) delivery
# agent. See the pipe(8) man page for information about ${recipient}
# and other message envelope options.
# ====================================================================
#
# maildrop. See the Postfix MAILDROP_README file for details.
# Also specify in main.cf: maildrop_destination_recipient_limit=1
#
maildrop unix - n n - - pipe
flags=DRhu user=vmail argv=/usr/bin/maildrop -d ${recipient}
#
# See the Postfix UUCP_README file for configuration details.
#
uucp unix - n n - - pipe
flags=Fqhu user=uucp argv=uux -r -n -z -a$sender - $nexthop!rmail ($recipient)
#
# Other external delivery methods.
#
ifmail unix - n n - - pipe
flags=F user=ftn argv=/usr/lib/ifmail/ifmail -r $nexthop ($recipient)
bsmtp unix - n n - - pipe
flags=Fq. user=bsmtp argv=/usr/lib/bsmtp/bsmtp -t$nexthop -f$sender $recipient
scalemail-backend unix - n n - 2 pipe
flags=R user=scalemail argv=/usr/lib/scalemail/bin/scalemail-store ${nexthop} ${user} ${extension}
mailman unix - n n - - pipe
flags=FR user=list argv=/usr/lib/mailman/bin/postfix-to-mailman.py
${nexthop} ${user}
#Vacation
vacation unix - n n - - pipe
flags=DRhu user=vacation argv=/var/spool/vacation/vacation.pl
amavis unix - - - - 2 smtp
-o smtp_data_done_timeout=1200
-o smtp_send_xforward_command=yes
127.0.0.1:10025 inet n - - - - smtpd
-o content_filter=
-o local_recipient_maps=
-o relay_recipient_maps=
-o smtpd_restriction_classes=
-o smtpd_client_restrictions=
-o smtpd_helo_restrictions=
-o smtpd_sender_restrictions=
-o smtpd_recipient_restrictions=permit_mynetworks,reject
-o mynetworks=127.0.0.0/8
-o strict_rfc821_envelopes=yes
-o receive_override_options=no_unknown_recipient_checks,no_header_body_checks
Step 12
Setting Courier-IMAP dan authentication Services
Contoh /etc/courier/authmysqlrc
MYSQL_SERVER 127.0.0.1
MYSQL_USERNAME postfix
MYSQL_PASSWORD post123456
MYSQL_DATABASE postfix
MYSQL_USER_TABLE mailbox
MYSQL_LOGIN_FIELD username
MYSQL_NAME_FIELD name
MYSQL_CRYPT_PWFIELD password
#MYSQL_CLEAR_PWFIELD password
#MYSQL_MAILDIR_FIELD maildir
MYSQL_MAILDIR_FIELD CONCAT(SUBSTRING_INDEX(Username,'@',-1),'/',SUBSTRING_INDEX(
Username,'@',1),'/')
MYSQL_QUOTA_FIELD concat(quota,'S')
MYSQL_HOME_FIELD '/home/vmail'
MYSQL_UID_FIELD '5000'
MYSQL_GID_FIELD '5000'
Step 13
SMTP Authentication
Contoh /etc/postfix/sasl/smtpd.conf
pwcheck_method: auxprop
auxprop_plugin: sql
mech_list: plain login cram-md5 digest-md5
sql_engine: mysql
sql_hostnames: 127.0.0.1
sql_user: postfix
sql_passwd: post123456
sql_database: postfix
sql_select: select password from users where email='%u@%r'
Untuk /etc/postfix/main.cf sudah ada diatas contohnya
Step 14
Postfixadmin
Download postfixadmin-2.1.0.tgz dari http://www.high5.net/postfixadmin
#tar -zxvf postfixadmin-2.1.0.tgz
copykan isi directory postfixadmin-2.1.0 ke /var/www/postfixadmin
Rubah file permission
# cd /var/www/postfixadmin
# chmod 640 *.php *.css
# cd /var/www/postfixadmin/admin/
# chmod 640 *.php .ht*
# cd /var/www/postfixadmin/images/
# chmod 640 *.gif *.png
# cd /var/www/postfixadmin/languages/
# chmod 640 *.lang
# cd /var/www/postfixadmin/templates/
# chmod 640 *.tpl
# cd /var/www/postfixadmin/users/
# chmod 640 *.php
Rubah kepemilikan file /var/www/postfixadmin
#chown -R www-data:www-data /var/www/postfixadmin
copy file /var/www/postfixadmin/config.inc.php.sample , contohnya sbb:
#cp /var/www/postfixadmin/config.inc.php.sample /var/www/postfixadmin/config.inc.php
dan edit isinya, pada bagian dibawah ini sesuaikan dengan username dan password di mysql yang telah diset dilangkah-langkah sebelumnya
$CONF['database_type'] = 'mysql';
$CONF['database_host'] = 'localhost';
$CONF['database_user'] = 'postfixadmin';
$CONF['database_password'] = 'postadmin123456';
$CONF['database_name'] = 'postfix';
$CONF['database_prefix'] = '';
buat file /etc/apache2/conf.d/postfixamdin.conf
yang isinya sbb:
AuthUserFile /var/www/postfixadmin/admin/.htpasswd
AuthGroupFile /dev/null
AuthName "Postfix Admin"
AuthType Basic
require valid-user
lalu restart apache2
#/etc/init.d/apache2 restart
Step 15
Untuk mengaktifkan Vacation caranya sbb:
Untuk webmail bisa menggunakan squirrelmail
#apt-get install squirrelmail
konfigurasinya ada di /usr/share/squirrelmail/config/conf.pl
Setting bagian server seperti contoh dibawah ini:
SquirrelMail Configuration : Read: config.php (1.4.0)
---------------------------------------------------------
Server Settings
General
-------
1. Domain : trim(implode('', file('/etc/'.(file_exists('/etc/mailname')?'mail':'host').'name')))
2. Invert Time : false
3. Sendmail or SMTP : SMTP
A. Update IMAP Settings : 127.0.0.1:143 (other)
B. Update SMTP Settings : 127.0.0.1:25
R Return to Main Menu
C Turn color on
S Save data
Q Quit
Command >>
lalu buat link /etc/apache2/conf.d/apache.conf ke /etc/squirrelmail/apache.conf
#ln -s /etc/squirrelmail/apache.conf /etc/apache2/conf.d/apache.conf
Step 18
Restart semua service yang ada
/etc/init.d/postfix restart
/etc/init.d/apache2 restart
/etc/init.d/courier-authdaemon restart
/etc/init.d/courier-imap restart
/etc/init.d/courier-imap-ssl restart
/etc/init.d/courier-pop restart
/etc/init.d/courier-pop-ssl restart
/etc/init.d/amavis restart
/etc/init.d/clamav-daemon restart
/etc/init.d/clamav-freshclam restart
Untuk mengkonfigure clamav caranya:
If you need clamd, you may also want to run apt-get install clamav-daemon
http://www.clamav.org/download/packages/packages-linux
catatan:
Berdoalah tidak ada yang error :)
Untuk membuka postfixadmin bisa diakses melalui
http://localhost/postfixadmin
Untuk membuka webmail bisa diakses melalui
http://localhost/squirrelmail
Untuk panduan penggunaan postfixadmin akan saya buat di blog selanjutnya udah kebanyakan nih apa gak pusing bacanya :)
Referensi yang saya baca adalah dari:
https://help.ubuntu.com/community/PostfixCompleteVirtualMailSystemHowto
http://workaround.org/articles/ispmail-sarge/index.shtml.en
http://www.purplehat.org/?page_id=11
Distro yang digunakan adalah Debian 4.0 rc3
Step 1
Install debian menggunakan netinst cd
Step 2
remove exim4 yang merupakan MTA standar bawaan debian
Step3
Install postfix:
#apt-get install postfix
pada saat proses install pilih "Internet Site"
Step4
Install Mysql map support untuk Postfix
#apt-get install postfix-mysql
#apt-get install mysq-client
#apt-get install mysql-server
Step5
Install Paket-paket untuk Client Access dan Authentication
#apt-get install courier-authdaemon
#apt-get install courier-authlib-mysql
#apt-get install courier-pop
pada saat proses install pilih "create directories for web-based administration = No"
#apt-get install courier-webadmin
pada saat proses install pilih "Activated CGI Program = No"
Password courier administration, misal = 123456
#apt-get install courier-pop-ssl
#apt-get install courier-imap
#apt-get install courier-imap-ssl
Step 6
Install Paket-paket untuk SMTP authentication
#apt-get install postfix-tls
#apt-get install libsasl2
#apt-get install libsasl2-modules
#apt-get install libsasl2-modules-sql
#apt-get install openssl
"Jangan lupa buat SSL Certificate untuk TLS to encrypt SMTP traffic"
For a certificate that is valid for ten years for the hostname smtp.domain.tld you would type this:
openssl req -new -outform PEM -out /etc/postfix/smtpd.cert -newkey rsa:2048 \
-nodes -keyout /etc/postfix/smtpd.key -keyform PEM -days 3650 -x509
You will then be asked a few question about the fields of the certificate. It does not matter what you enter. Just fill the fields. One exception though - the "Common Name" must be the hostname of your mail server. Example session:
Country Name (2 letter code) [AU]:ID
State or Province Name (full name) [Some-State]:DKI-Jakarta
Locality Name (eg, city) []:Jakarta
Organization Name (eg, company) [Internet Widgits Pty Ltd]:PT. Data Utama Dinamika
Organizational Unit Name (eg, section) []:IT
Common Name (eg, YOUR name) []:smtp.domain.tld
Email Address []:postmaster@domain.tld
After a short moment you will get two files: "smtpd.key" (the private key file) and "smtpd.cert" (the certificate).
Install php module
#apt-get install php4
#apt-get install php4-mysql
#apt-get install php4-pear
Install antivirus dan antispam
#apt-get install amavis
#apt-get install clamav
#apt-get install clamav-daemon
#apt-get install spamassassin
Step 7
Setting Mysql Backend
Setting password root mysql, misal mysql123456
#mysqladmin -u root password mysql123456
Step 8
Setting Mysql Database
#mysql -u root -p
password: mysql123456
mysql> CREATE DATABASE postifx;
mysql> GRANT SELECT ON postfix.* TO postfix@localhost IDENTIFIED BY 'post123456';
mysql> GRANT SELECT, INSERT, DELETE, UPDATE ON postfix.* TO postfixadmin@localhost IDENTIFIED by 'postadmin123456'
mysql> flush privileges;
mysql> quit;
catatan: command disebelah kanan mysql> ditulis perbaris
Untuk membuat table dalam database postfix salin script sql berikut, misal sebagai file postfix.sql
-- MySQL dump 10.11
--
-- Host: localhost Database: postfix
-- ------------------------------------------------------
-- Server version 5.0.32-Debian_7etch4-log
/*!40101 SET @OLD_CHARACTER_SET_CLIENT=@@CHARACTER_SET_CLIENT */;
/*!40101 SET @OLD_CHARACTER_SET_RESULTS=@@CHARACTER_SET_RESULTS */;
/*!40101 SET @OLD_COLLATION_CONNECTION=@@COLLATION_CONNECTION */;
/*!40101 SET NAMES utf8 */;
/*!40103 SET @OLD_TIME_ZONE=@@TIME_ZONE */;
/*!40103 SET TIME_ZONE='+00:00' */;
/*!40014 SET @OLD_UNIQUE_CHECKS=@@UNIQUE_CHECKS, UNIQUE_CHECKS=0 */;
/*!40014 SET @OLD_FOREIGN_KEY_CHECKS=@@FOREIGN_KEY_CHECKS, FOREIGN_KEY_CHECKS=0 */;
/*!40101 SET @OLD_SQL_MODE=@@SQL_MODE, SQL_MODE='NO_AUTO_VALUE_ON_ZERO' */;
/*!40111 SET @OLD_SQL_NOTES=@@SQL_NOTES, SQL_NOTES=0 */;
--
-- Table structure for table `admin`
--
DROP TABLE IF EXISTS `admin`;
CREATE TABLE `admin` (
`username` varchar(255) NOT NULL default '',
`password` varchar(255) NOT NULL default '',
`created` datetime NOT NULL default '0000-00-00 00:00:00',
`modified` datetime NOT NULL default '0000-00-00 00:00:00',
`active` tinyint(1) NOT NULL default '1',
PRIMARY KEY (`username`),
KEY `username` (`username`)
) ENGINE=MyISAM DEFAULT CHARSET=latin1 COMMENT='Postfix Admin - Virtual Admins';
--
-- Table structure for table `alias`
--
DROP TABLE IF EXISTS `alias`;
CREATE TABLE `alias` (
`address` varchar(255) NOT NULL default '',
`goto` text NOT NULL,
`domain` varchar(255) NOT NULL default '',
`created` datetime NOT NULL default '0000-00-00 00:00:00',
`modified` datetime NOT NULL default '0000-00-00 00:00:00',
`active` tinyint(1) NOT NULL default '1',
PRIMARY KEY (`address`),
KEY `address` (`address`)
) ENGINE=MyISAM DEFAULT CHARSET=latin1 COMMENT='Postfix Admin - Virtual Aliases';
--
-- Table structure for table `domain`
--
DROP TABLE IF EXISTS `domain`;
CREATE TABLE `domain` (
`domain` varchar(255) NOT NULL default '',
`description` varchar(255) NOT NULL default '',
`aliases` int(10) NOT NULL default '0',
`mailboxes` int(10) NOT NULL default '0',
`maxquota` int(10) NOT NULL default '0',
`transport` varchar(255) default NULL,
`backupmx` tinyint(1) NOT NULL default '0',
`created` datetime NOT NULL default '0000-00-00 00:00:00',
`modified` datetime NOT NULL default '0000-00-00 00:00:00',
`active` tinyint(1) NOT NULL default '1',
PRIMARY KEY (`domain`),
KEY `domain` (`domain`)
) ENGINE=MyISAM DEFAULT CHARSET=latin1 COMMENT='Postfix Admin - Virtual Domains';
--
-- Table structure for table `domain_admins`
--
DROP TABLE IF EXISTS `domain_admins`;
CREATE TABLE `domain_admins` (
`username` varchar(255) NOT NULL default '',
`domain` varchar(255) NOT NULL default '',
`created` datetime NOT NULL default '0000-00-00 00:00:00',
`active` tinyint(1) NOT NULL default '1',
KEY `username` (`username`)
) ENGINE=MyISAM DEFAULT CHARSET=latin1 COMMENT='Postfix Admin - Domain Admins';
--
-- Table structure for table `log`
--
DROP TABLE IF EXISTS `log`;
CREATE TABLE `log` (
`timestamp` datetime NOT NULL default '0000-00-00 00:00:00',
`username` varchar(255) NOT NULL default '',
`domain` varchar(255) NOT NULL default '',
`action` varchar(255) NOT NULL default '',
`data` varchar(255) NOT NULL default '',
KEY `timestamp` (`timestamp`)
) ENGINE=MyISAM DEFAULT CHARSET=latin1 COMMENT='Postfix Admin - Log';
--
-- Table structure for table `mailbox`
--
DROP TABLE IF EXISTS `mailbox`;
CREATE TABLE `mailbox` (
`username` varchar(255) NOT NULL default '',
`password` varchar(255) NOT NULL default '',
`name` varchar(255) NOT NULL default '',
`maildir` varchar(255) NOT NULL default '',
`quota` int(10) NOT NULL default '0',
`domain` varchar(255) NOT NULL default '',
`created` datetime NOT NULL default '0000-00-00 00:00:00',
`modified` datetime NOT NULL default '0000-00-00 00:00:00',
`active` tinyint(1) NOT NULL default '1',
PRIMARY KEY (`username`),
KEY `username` (`username`)
) ENGINE=MyISAM DEFAULT CHARSET=latin1 COMMENT='Postfix Admin - Virtual Mailboxes';
--
-- Table structure for table `vacation`
--
DROP TABLE IF EXISTS `vacation`;
CREATE TABLE `vacation` (
`email` varchar(255) NOT NULL default '',
`subject` varchar(255) NOT NULL default '',
`body` text NOT NULL,
`cache` text NOT NULL,
`domain` varchar(255) NOT NULL default '',
`created` datetime NOT NULL default '0000-00-00 00:00:00',
`active` tinyint(1) NOT NULL default '1',
PRIMARY KEY (`email`),
KEY `email` (`email`)
) ENGINE=MyISAM DEFAULT CHARSET=latin1 COMMENT='Postfix Admin - Virtual Vacation';
/*!40103 SET TIME_ZONE=@OLD_TIME_ZONE */;
/*!40101 SET SQL_MODE=@OLD_SQL_MODE */;
/*!40014 SET FOREIGN_KEY_CHECKS=@OLD_FOREIGN_KEY_CHECKS */;
/*!40014 SET UNIQUE_CHECKS=@OLD_UNIQUE_CHECKS */;
/*!40101 SET CHARACTER_SET_CLIENT=@OLD_CHARACTER_SET_CLIENT */;
/*!40101 SET CHARACTER_SET_RESULTS=@OLD_CHARACTER_SET_RESULTS */;
/*!40101 SET COLLATION_CONNECTION=@OLD_COLLATION_CONNECTION */;
/*!40111 SET SQL_NOTES=@OLD_SQL_NOTES */;
-- Dump completed on 2008-07-07 9:12:19
kemudian ketik
#mysql -u root -p postifx < size="2">
user = postfix
password = post123456
hosts = 127.0.0.1
dbname = postfix
table = alias
select_field = goto
where_field = address
Script "mysql_virtual_domains_maps.cf
#nano /etc/postfix/mysql_virtual_domains_maps.cf
lalu salin code dibawah ini
user = postfix
password = post123456
hosts = 127.0.0.1
dbname = postfix
table = domain
select_field = domain
where_field = domain
#additional_conditions = and backupmx = '0' and active = '1'
Script "mysql_virtual_mailbox_maps.cf"
#nano /etc/postfix/mysql_virtual_mailbox_maps.cf
lalu salin code dibawah ini
user = postfix
password = post123456
hosts = 127.0.0.1
dbname = postfix
table = mailbox
#select_field = maildir
select_field = CONCAT(SUBSTRING_INDEX(Username,'@',-1),'/',SUBSTRING_INDEX(Username,'@',1),'/')
where_field = username
#additional_conditions = and active = '1'
Script "mysql_virtual_mailbox_limit_maps.cf"
#nano /etc/postfix/mysql_virtual_mailbox_limit_maps.cf
lalu salin code dibawah ini
user = postfix
password = post123456
hosts = 127.0.0.1
dbname = postfix
table = mailbox
select_field = quota
where_field = username
#additional_conditions = and active = '1'
Script "mysql_relay_domains_maps.cf"
#nano /etc/postfix/mysql_relay_domains_maps.c
lalu salin code dibawah ini
user = postfix
password = post123456
hosts = 127.0.0.1
dbname = postfix
table = domain
select_field = domain
where_field = domain
additional_conditions = and backupmx = '1'
Untuk keamanan rubah group dan file permission dari file-file diatas dengan cara:
#chgrp postfix /etc/postfix/mysql_*.cf
#chmod 640 /etc/postfix/mysql_*.cf
Step 10
Buat vlmail user
Dengan system ini maka mailbox user akan disimpan di MySQL database dan di /home/vmail
sehingga user-user email tidak perlu memiliki UID sendiri di /etc/passwd untuk itu perlu dibuat user vmai.
#groupadd -g 5000 vmail
#useradd -m -g vmail -u 5000 -d /home/vmail -s /bin/bash vmail
Step 11
Konfigurasi Postfix dengan Mysql maps
berikut adalah contoh file /etc/postfix/main.cf yang saya gunakan
# See /usr/share/postfix/main.cf.dist for a commented, more complete version
# Debian specific: Specifying a file name will cause the first
# line of that file to be used as the name. The Debian default
# is /etc/mailname.
#myorigin = /etc/mailname
smtpd_banner = $myhostname ESMTP $mail_name (Debian/GNU)
biff = no
# appending .domain is the MUA's job.
append_dot_mydomain = no
# Uncomment the next line to generate "delayed mail" warnings
#delay_warning_time = 4h
# TLS parameters
smtpd_tls_cert_file=/etc/ssl/certs/ssl-cert-snakeoil.pem
smtpd_tls_key_file=/etc/ssl/private/ssl-cert-snakeoil.key
smtpd_use_tls=yes
smtpd_tls_session_cache_database = btree:${queue_directory}/smtpd_scache
smtp_tls_session_cache_database = btree:${queue_directory}/smtp_scache
# See /usr/share/doc/postfix/TLS_README.gz in the postfix-doc package for
# information on enabling SSL in the smtp client.
myhostname = email.javathebest.com
alias_maps = hash:/etc/aliases
myorigin = /etc/mailname
mydestination = email.javathebest.com, localhost.javathebest.com, localhost
relayhost =
mynetworks = 127.0.0.0/8, 10.19.2.0/24, 10.19.3.0/24, 222.124.20.192/29, 192.168.2.0/24
mailbox_command = procmail -a "$EXTENSION"
mailbox_size_limit = 0
recipient_delimiter = +
inet_interfaces = all
virtual_alias_maps = mysql:/etc/postfix/mysql_virtual_alias_maps.cf
virtual_mailbox_domains = mysql:/etc/postfix/mysql_virtual_domains_maps.cf
virtual_mailbox_maps = mysql:/etc/postfix/mysql_virtual_mailbox_maps.cf
virtual_mailbox_base = /home/vmail
virtual_uid_maps = static:5000
virtual_gid_maps = static:5000
#Additional for quota support
virtual_create_maildirsize = yes
virtual_mailbox_extended = yes
virtual_mailbox_limit_maps = mysql:/etc/postfix/mysql_virtual_mailbox_limit_maps.cf
virtual_mailbox_limit_override = yes
virtual_maildir_limit_message = Sorry, the your maildir has overdrawn your diskspace quota, please free up some of space of your mailbox try again.
virtual_overquota_bounce = yes
smtpd_sasl_auth_enable = yes
broken_sasl_auth_clients = yes
smtpd_recipient_restrictions = permit_mynetworks, permit_sasl_authenticated, reject_unauth_destination
smtpd_tls_cert_file = /etc/postfix/smtpd.cert
smtpd_tls_key_file = /etc/postfix/smtpd.key
transport_maps = hash:/etc/postfix/transport
#Amavis
content_filter = amavis:[127.0.0.1]:10024
receive_override_options = no_address_mappings
#tambahan konfigurasi utk lebih aman
strict_rfc821_envelopes = yes
disable_vrfy_command = yes
smtpd_delay_reject = yes
smtpd_helo_required = yes
smtpd_client_restrictions =
smtpd_sender_restrictions =
permit_sasl_authenticated,
permit_mynetworks,
reject_non_fqdn_sender,
reject_unknown_sender_domain,
permit
maps_rbl_domains = relays.ordb.org,
bl.spamcop.net,
list.dsbl.org,
sbl-xbl.spamhaus.org
smtpd_recipient_restrictions =
reject_unauth_pipelining,
reject_non_fqdn_recipient,
reject_unknown_recipient_domain,
reject_unknown_sender_domain,
#localonly
# check_sender_access hash:/etc/postfix/restricted_senders
#localonly
permit_mynetworks,
permit_sasl_authenticated,
reject_unauth_destination,
# reject_maps_rbl,
# reject_rbl_client relays.ordb.org,
reject_rbl_client list.dsbl.org,
reject_rbl_client sbl-xbl.spamhaus.org,
permit
#localonly
#smtpd_restriction_classes = local_only
#local_only =
# check_recipient_access hash:/etc/postfix/local_domains, reject
#localonly
dan berikut adalah contoh file /etc/postfix/master.cf
#
# Postfix master process configuration file. For details on the format
# of the file, see the master(5) manual page (command: "man 5 master").
#
# ==========================================================================
# service type private unpriv chroot wakeup maxproc command + args
# (yes) (yes) (yes) (never) (100)
# ==========================================================================
smtp inet n - - - - smtpd
#submission inet n - - - - smtpd
# -o smtpd_enforce_tls=yes
# -o smtpd_sasl_auth_enable=yes
# -o smtpd_client_restrictions=permit_sasl_authenticated,reject
#smtps inet n - - - - smtpd
# -o smtpd_tls_wrappermode=yes
# -o smtpd_sasl_auth_enable=yes
# -o smtpd_client_restrictions=permit_sasl_authenticated,reject
#628 inet n - - - - qmqpd
pickup fifo n - - 60 1 pickup
cleanup unix n - - - 0 cleanup
qmgr fifo n - n 300 1 qmgr
#qmgr fifo n - - 300 1 oqmgr
tlsmgr unix - - - 1000? 1 tlsmgr
rewrite unix - - - - - trivial-rewrite
bounce unix - - - - 0 bounce
defer unix - - - - 0 bounce
trace unix - - - - 0 bounce
verify unix - - - - 1 verify
flush unix n - - 1000? 0 flush
proxymap unix - - n - - proxymap
smtp unix - - - - - smtp
# When relaying mail as backup MX, disable fallback_relay to avoid MX loops
relay unix - - - - - smtp
-o fallback_relay=
# -o smtp_helo_timeout=5 -o smtp_connect_timeout=5
showq unix n - - - - showq
error unix - - - - - error
discard unix - - - - - discard
local unix - n n - - local
virtual unix - n n - - virtual
lmtp unix - - - - - lmtp
anvil unix - - - - 1 anvil
scache unix - - - - 1 scache
#
# ====================================================================
# Interfaces to non-Postfix software. Be sure to examine the manual
# pages of the non-Postfix software to find out what options it wants.
#
# Many of the following services use the Postfix pipe(8) delivery
# agent. See the pipe(8) man page for information about ${recipient}
# and other message envelope options.
# ====================================================================
#
# maildrop. See the Postfix MAILDROP_README file for details.
# Also specify in main.cf: maildrop_destination_recipient_limit=1
#
maildrop unix - n n - - pipe
flags=DRhu user=vmail argv=/usr/bin/maildrop -d ${recipient}
#
# See the Postfix UUCP_README file for configuration details.
#
uucp unix - n n - - pipe
flags=Fqhu user=uucp argv=uux -r -n -z -a$sender - $nexthop!rmail ($recipient)
#
# Other external delivery methods.
#
ifmail unix - n n - - pipe
flags=F user=ftn argv=/usr/lib/ifmail/ifmail -r $nexthop ($recipient)
bsmtp unix - n n - - pipe
flags=Fq. user=bsmtp argv=/usr/lib/bsmtp/bsmtp -t$nexthop -f$sender $recipient
scalemail-backend unix - n n - 2 pipe
flags=R user=scalemail argv=/usr/lib/scalemail/bin/scalemail-store ${nexthop} ${user} ${extension}
mailman unix - n n - - pipe
flags=FR user=list argv=/usr/lib/mailman/bin/postfix-to-mailman.py
${nexthop} ${user}
#Vacation
vacation unix - n n - - pipe
flags=DRhu user=vacation argv=/var/spool/vacation/vacation.pl
amavis unix - - - - 2 smtp
-o smtp_data_done_timeout=1200
-o smtp_send_xforward_command=yes
127.0.0.1:10025 inet n - - - - smtpd
-o content_filter=
-o local_recipient_maps=
-o relay_recipient_maps=
-o smtpd_restriction_classes=
-o smtpd_client_restrictions=
-o smtpd_helo_restrictions=
-o smtpd_sender_restrictions=
-o smtpd_recipient_restrictions=permit_mynetworks,reject
-o mynetworks=127.0.0.0/8
-o strict_rfc821_envelopes=yes
-o receive_override_options=no_unknown_recipient_checks,no_header_body_checks
Step 12
Setting Courier-IMAP dan authentication Services
Contoh /etc/courier/authmysqlrc
MYSQL_SERVER 127.0.0.1
MYSQL_USERNAME postfix
MYSQL_PASSWORD post123456
MYSQL_DATABASE postfix
MYSQL_USER_TABLE mailbox
MYSQL_LOGIN_FIELD username
MYSQL_NAME_FIELD name
MYSQL_CRYPT_PWFIELD password
#MYSQL_CLEAR_PWFIELD password
#MYSQL_MAILDIR_FIELD maildir
MYSQL_MAILDIR_FIELD CONCAT(SUBSTRING_INDEX(Username,'@',-1),'/',SUBSTRING_INDEX(
Username,'@',1),'/')
MYSQL_QUOTA_FIELD concat(quota,'S')
MYSQL_HOME_FIELD '/home/vmail'
MYSQL_UID_FIELD '5000'
MYSQL_GID_FIELD '5000'
Step 13
SMTP Authentication
Contoh /etc/postfix/sasl/smtpd.conf
pwcheck_method: auxprop
auxprop_plugin: sql
mech_list: plain login cram-md5 digest-md5
sql_engine: mysql
sql_hostnames: 127.0.0.1
sql_user: postfix
sql_passwd: post123456
sql_database: postfix
sql_select: select password from users where email='%u@%r'
Untuk /etc/postfix/main.cf sudah ada diatas contohnya
Step 14
Postfixadmin
Download postfixadmin-2.1.0.tgz dari http://www.high5.net/postfixadmin
#tar -zxvf postfixadmin-2.1.0.tgz
copykan isi directory postfixadmin-2.1.0 ke /var/www/postfixadmin
Rubah file permission
# cd /var/www/postfixadmin
# chmod 640 *.php *.css
# cd /var/www/postfixadmin/admin/
# chmod 640 *.php .ht*
# cd /var/www/postfixadmin/images/
# chmod 640 *.gif *.png
# cd /var/www/postfixadmin/languages/
# chmod 640 *.lang
# cd /var/www/postfixadmin/templates/
# chmod 640 *.tpl
# cd /var/www/postfixadmin/users/
# chmod 640 *.php
Rubah kepemilikan file /var/www/postfixadmin
#chown -R www-data:www-data /var/www/postfixadmin
copy file /var/www/postfixadmin/config.inc.php.sample , contohnya sbb:
#cp /var/www/postfixadmin/config.inc.php.sample /var/www/postfixadmin/config.inc.php
dan edit isinya, pada bagian dibawah ini sesuaikan dengan username dan password di mysql yang telah diset dilangkah-langkah sebelumnya
$CONF['database_type'] = 'mysql';
$CONF['database_host'] = 'localhost';
$CONF['database_user'] = 'postfixadmin';
$CONF['database_password'] = 'postadmin123456';
$CONF['database_name'] = 'postfix';
$CONF['database_prefix'] = '';
buat file /etc/apache2/conf.d/postfixamdin.conf
yang isinya sbb:
AuthUserFile /var/www/postfixadmin/admin/.htpasswd
AuthGroupFile /dev/null
AuthName "Postfix Admin"
AuthType Basic
require valid-user
lalu restart apache2
#/etc/init.d/apache2 restart
Step 15
Untuk mengaktifkan Vacation caranya sbb:
Create Vacation user and group accounts:
#groupadd vacation
#useradd vacation -c Virtual\ Vacation -d /nonexistent -g vacation -s /sbin/nologin
Create, populate and secure vacation directory:
#mkdir /var/spool/vacation
#cp /var/www/postfixadmin/VIRTUAL_VACATION/vacation.pl /var/spool/vacation/
#chown -R vacation:vacation /var/spool/vacation/
#chmod 700 /var/spool/vacation/
#chmod 750 /var/spool/vacation/vacation.pl
#touch /var/log/vacation.log /var/log/vacation-debug.log
#chown vacation:vacation /var/log/vacation*
Edit /var/spool/vacation/vacation.pl script:
Find and edit the RED TEXT.
use DBI;
use strict;
my $db_type = ‘mysql’;
my $db_host = ‘localhost‘;
my $db_user = ‘postfixadmin‘;
my $db_pass = ‘postadmin123456‘;
my $db_name = ‘postfix‘;
my $sendmail = “/usr/sbin/sendmail”;
my $logfile = “/var/log/vacation.log“;    # specify a file name here for example: vacation.log
my $debugfile = “/var/log/vacation-debug.log“;  # sepcify a file name here for example: vacation.debug
my $syslog = 1;   # 1 if log entries should be sent to syslog
…
Edit /etc/postfix/master.cf for vacation filter:
Add this to the bottom of the file.
vacation  unix  -       n       n       -       -       pipe
flags=DRhu user=vacation argv=/var/spool/vacation/vacation.pl
Edit /etc/postfix/main.cf for vacation transport:
Find and edit the RED TEXT.
… # TRANSPORT MAP # # See the discussion in the ADDRESS_REWRITING_README document. transport_maps = hash:/etc/postfix/transport vacation_destination_recipient_limit = 1 …
Add proper lines to /usr/local/etc/postfix/transport file:
#echo 'autoreply.domain.tld vacation:' >> /etc/postfix/transport
Create our transport map database for Postfix:
#postmap /etc/postfix/transport
Create PostfixAdmin username and password:
#cd /var/www/postfixadmin/admin
#htpasswd -c .htpasswd admin
(Enter password)
(Re-enter password)
step 17
Untuk webmail bisa menggunakan squirrelmail
#apt-get install squirrelmail
konfigurasinya ada di /usr/share/squirrelmail/config/conf.pl
Setting bagian server seperti contoh dibawah ini:
SquirrelMail Configuration : Read: config.php (1.4.0)
---------------------------------------------------------
Server Settings
General
-------
1. Domain : trim(implode('', file('/etc/'.(file_exists('/etc/mailname')?'mail':'host').'name')))
2. Invert Time : false
3. Sendmail or SMTP : SMTP
A. Update IMAP Settings : 127.0.0.1:143 (other)
B. Update SMTP Settings : 127.0.0.1:25
R Return to Main Menu
C Turn color on
S Save data
Q Quit
Command >>
lalu buat link /etc/apache2/conf.d/apache.conf ke /etc/squirrelmail/apache.conf
#ln -s /etc/squirrelmail/apache.conf /etc/apache2/conf.d/apache.conf
Step 18
Restart semua service yang ada
/etc/init.d/postfix restart
/etc/init.d/apache2 restart
/etc/init.d/courier-authdaemon restart
/etc/init.d/courier-imap restart
/etc/init.d/courier-imap-ssl restart
/etc/init.d/courier-pop restart
/etc/init.d/courier-pop-ssl restart
/etc/init.d/amavis restart
/etc/init.d/clamav-daemon restart
/etc/init.d/clamav-freshclam restart
Untuk mengkonfigure clamav caranya:
We recommend that you use one of the Debian volatile repositories to keep your ClamAV installation updated on your system.
Always choose the mirror closest to you.
Edit /etc/apt/sources.list and add a line like this to it:
stable/etch:
deb http://volatile.debian.org/debian-volatile etch/volatile main contrib non-free
Then run apt-get update; apt-get install clamavIf you need clamd, you may also want to run apt-get install clamav-daemon
http://www.clamav.org/download/packages/packages-linux
catatan:
Berdoalah tidak ada yang error :)
Untuk membuka postfixadmin bisa diakses melalui
http://localhost/postfixadmin
Untuk membuka webmail bisa diakses melalui
http://localhost/squirrelmail
Untuk panduan penggunaan postfixadmin akan saya buat di blog selanjutnya udah kebanyakan nih apa gak pusing bacanya :)
Langganan:
Postingan (Atom)