PT. Hawk Teknologi Solusi

Silahkan Cari Disini

Sabtu, 26 Februari 2011

Bonding Two ADSL

Because I must wait 1-2 months to upgrade my Intercity Leased Line (LL) between Indonesia Internet Exchange (IIX) locate in Cyber Building, South Jakarta with my remote site with distance 266km so i try using Mikrotik Interface Bonding Solution, and it works.

So this is the configuration for Mikrotik Router locate in remote site:

I used two ADSL connection

/interface pppoe-client
add ac-name="" add-default-route=no allow=pap,chap,mschap1,mschap2 \
dial-on-demand=no disabled=no interface=ether1_adsl1 max-mru=1480 max-mtu=\
1480 mrru=disabled name=telkom1 password=123456 profile=pppoe \
service-name="" use-peer-dns=no user=adsl1@telkom.net
add ac-name="" add-default-route=no allow=pap,chap,mschap1,mschap2 \
dial-on-demand=no disabled=no interface=ether3_adsl2 max-mru=1480 max-mtu=\
1480 mrru=disabled name=telkom2 password=123456 profile=pppoe \
service-name="" use-peer-dns=no user=adsl2@telkom.net

note:

  1. password=123456 , this is just example you must using your own password
  2. user=adsl1@telkom.net, this is just example you must using your own user

[Me@RemoteSite] /ip address print detail
Flags: X - disabled, I - invalid, D - dynamic
0 ;;; BONDING PDA1 D3
address=1.2.3.62/30 network=1.2.3.60
interface=BONDING_PDA1_D3_EOIP actual-interface=BONDING_PDA1_D3_EOIP

5 D address=1.2.255.218/32 network=1.2.255.1 interface=telkom2
actual-interface=telkom2

6 D address=1.2.251.170/32 network=1.2.250.1 interface=telkom1
actual-interface=telkom1

note:

  1. address=1.2.3.63/30 , this is point-to-point ip address between bonding interface jakarta with remote site
  2. address=1.2.255.218/32 and address=1.2.250.170/32, this is ip address from ADSL provider, this is good because between telkom1 and telkom2 using different gateway and network so we can create different routing statick for two eoip connection for each ADSL


/ip route
add check-gateway=ping comment="DEFAULT GATEWAY via BONDING RO JAKARTA" \
disabled=no distance=1 dst-address=0.0.0.0/0 gateway=1.2.3.61 scope=30 \
target-scope=10
add comment="ROUTING To LOOPBACK1 RO JAKARTA via ADSL 1" \
disabled=no distance=1 dst-address=1.2.3.38/32 gateway=1.2.250.1 \
scope=30 target-scope=10
add comment="ROUTING To LOOPBACK2 RO JAKARTA via ADSL 2" \
disabled=no distance=1 dst-address=1.2.3.41/32 gateway=1.2.255.1 \
scope=30 target-scope=10
add comment="DNS ADSL1" disabled=no distance=1 dst-address=202.134.0.155/32 \
gateway=1.2.250.1,118.96.255.1 scope=30 target-scope=10
add comment="DNS ADSL2" disabled=no distance=1 dst-address=202.134.1.10/32 \
gateway=1.2.250.1,118.96.255.1 scope=30 target-scope=10

note:

  1. LOOPBACK1 and LOOPBACK2 is the ip address on lobridge1 and lobridge2 interface at Jakarta Router, just to make sure each eoip interface have their remote-address

/interface eoip
add arp=enabled comment="remote address 1.2.3.38 ip loopback rb1000 jkt" \
disabled=no l2mtu=65535 mac-address=02:83:30:AC:C5:18 mtu=1500 name=\
EOIP_PDA1_D3_4793 remote-address=1.2.3.38 tunnel-id=4793
add arp=enabled comment="remote address 1.2.3.41 ip loopback rb1000 jkt" \
disabled=no l2mtu=65535 mac-address=02:83:30:AC:C5:18 mtu=1500 name=\
EOIP_PDA1_D3_7814 remote-address=1.2.3.41 tunnel-id=7814

note:

  1. I using two EOIP interface , each EOIP connected using ADSL to Jakarta Router, because my Jakarta Router directly connected to IIX so from Jakarta Router to RemoteSite Router connected through IIX to ADSL provider


/interface bonding
add arp=enabled arp-interval=100ms arp-ip-targets=1.2.3.61 disabled=no \
down-delay=0ms lacp-rate=30secs link-monitoring=arp mii-interval=100ms \
mode=balance-rr mtu=1500 name=BONDING_PDA1_D3_EOIP primary=none slaves=\
EOIP_PDA1_D3_4793,EOIP_PDA1_D3_7814 transmit-hash-policy=layer-2 up-delay=\
0ms

note:

  1. arp-ip-targets=1.2.3.61, this is ip monitoring on Jakarta Router
  2. mode=balance-rr, this is bonding mode i used, balance-rr its mean the data will tx and rx using round-robin and give balance and fail-over between slave interface

I using NAT to masquerade all traffic out through Bonding interface to make sure the src-address from my remote-site is replace with IP 1.2.3.62

/ip firewall nat
add action=masquerade chain=srcnat comment="NAT via BONDING" disabled=no \
out-interface=BONDING_PDA1_D3_EOIP


And this is configuration for Mikrotik Router locate in Jakarta:

/interface bridge
add admin-mac=00:00:00:00:00:00 ageing-time=5m arp=enabled auto-mac=yes \
comment="" disabled=no forward-delay=15s l2mtu=65535 max-message-age=20s \
mtu=1500 name=lobridge1 priority=0x8000 protocol-mode=none \
transmit-hold-count=6
add admin-mac=00:00:00:00:00:00 ageing-time=5m arp=enabled auto-mac=yes \
comment="" disabled=no forward-delay=15s l2mtu=65535 max-message-age=20s \
mtu=1500 name=lobridge2 priority=0x8000 protocol-mode=none \
transmit-hold-count=6

note:

  1. lobridge interface using for ip loopback for remote-address eoip from RemoteSite


/interface eoip
add arp=enabled comment="" disabled=no l2mtu=65535 mac-address=\
02:8B:E1:15:7E:C5 mtu=1500 name=EOIP_4793 remote-address=\
1.2.251.170 tunnel-id=4793
add arp=enabled comment="" disabled=no l2mtu=65535 mac-address=\
02:8B:E1:15:7E:C5 mtu=1500 name=EOIP_7814 remote-address=\
1.2.255.218 tunnel-id=7814


/interface bonding
add arp=enabled arp-interval=100ms arp-ip-targets=1.2.3.62 comment="" \
disabled=no down-delay=0s lacp-rate=30secs link-monitoring=arp \
mii-interval=100ms mode=balance-rr mtu=1500 name=BONDING_PDA1_D3_EOIP \
primary=none slaves=EOIP_PDA1_D3_4793,EOIP_PDA1_D3_7814 \
transmit-hash-policy=layer-2 up-delay=0s


[Me@Jakarta] > /ip address print
Flags: X - disabled, I - invalid, D - dynamic
1 ;;; IIX BGP Peering
1.2.3.22/30 1.2.3.20 1.2.3.23 ether2_OIXP
5 ;;; IP Loopback1
1.2.3.38/32 1.2.3.38 1.2.3.38 lobridge1
6 ;;; IP Loopback2
1.2.3.41/32 1.2.3.41 1.2.3.41 lobridge2
11 ;;; BONDING
1.2.3.61/30 1.2.3.60 1.2.3.63 BONDING_PDA1_D3_EOIP


Note:

  1. Jakarta Router directly connected to IIX so routing table from Jakarta to ADSL at RemoteSite is through IIX and the routing table is using BGP protocol between Jakarta Router to IIX Router


Jumat, 25 Februari 2011

Youtube IP Address and how to manipulate Youtube routing in Mikrotik Router

If you have more then one ISP you can manipulate routing for Youtube traffic to ISP with the best download rate for Youtube content

/ip firewall address-list
add address=74.125.0.0/16 comment=Google disabled=no list=youtube
add address=114.112.182.156 comment=TuDou disabled=no list=youtube
add address=221.12.89.120 comment=TuDou disabled=no list=youtube
add address=64.15.112.0/20 comment=YouTube disabled=no list=youtube
add address=64.15.120.0/21 comment=YouTube disabled=no list=youtube
add address=208.65.152.0/22 comment=YouTube disabled=no list=youtube
add address=208.117.224.0/19 comment=YouTube disabled=no list=youtube
add address=209.85.128.0/17 comment=Google disabled=no list=youtube


/ip firewall mangle
add action=mark-routing chain=prerouting \
comment="Routing Mark Youtube" disabled=no \
dst-address-list=youtube new-routing-mark=youtube passthrough=no

correction:
because if you mangle routing-mark all protocol and you have email server inside your network the email from gmail will failed to received so better you just mangle routing-mark for protocol tcp dst-port 80, like this:

/ip firewall mangle
add action=mark-routing chain=prerouting comment="Routing Mark Youtube" \
disabled=no dst-address-list=youtube dst-port=80 new-routing-mark=\
youtube passthrough=no protocol=tcp

/ip route
add comment="Routing Youtube" disabled=no dst-address=0.0.0.0/0 \
gateway=1.2.3.4 routing-mark=youtube

/ip firewall nat
add action=masquerade chain=srcnat \
comment="NAT Youtube via ISP Youtube" \
disabled=no out-interface=INTERFACE_TO_ISP_YOUTUBE


Note:
  1. gateway=1.2.3.4, you must using your ISP gateway for Youtube traffic depend on your choice whic one of your ISP is best for Youtube traffic
  2. out-interface=INTERFACE_TO_ISP_YOUTUBE, change to your ISP interface at your mikrotik router

To avoid problem if your ISP for Youtube down you can copy-paste this script to mikrotik terminal:

/system script
add name=check_youtube policy=\
ftp,reboot,read,write,policy,test,winbox,password,sniff,sensitive source="\
:if ( [/ping 1.2.3.4 count=1]=1) do={\r\
\n:log info \"Youtube Up\";\r\
\n:foreach i in=[/ip route find routing-mark=\"youtube\"] do={/ip route se\
t \$i disable=no};\r\
\n/tool e-mail send to=\"your@email.net\" subject=([/system ident\
ity get name] . \" Youtube Up \" . [/system clock get date]) body=\"Youtub\
e Routing Mark Enable\";\r\
\n} else={\r\
\n:log info \"Youtube Down\";\r\
\n:foreach i in=[/ip route find routing-mark=\"youtube\"] do={/ip route se\
t \$i disable=yes};\r\
\n/tool e-mail send to=\"your@email.net\" subject=([/system ident\
ity get name] . \" Youtube Down \" . [/system clock get date]) body=\"Yout\
ube Routing Mark Disable\";\r\
\n}"

and activate this script from Netwatch

/tool netwatch
add comment="Youtube Check" disabled=no down-script=check_youtube host=\
1.2.3.4 interval=1m timeout=25ms up-script=check_youtube


Source:
http://www.robtex.com/as/as36561.html#bgp

Kamis, 24 Februari 2011

Jika Paket Data Tidak mau jalan lewat tunnel


Kadang kala pengiriman data via tunnel mengalami kendala khususnya paket-paket TCP, jika anda menghadapi masalah tersebut jangan pusing solusinya adalah buat mangle di chain forward utk tcp syn action change mss clamp to pmtu, tujuannya agar tunnel tersebut bisa mengatur parameter MTU (Maximum Transfer Unit) yang mungkin berbeda diantara end-point tersebut

Sabtu, 06 November 2010

Cek IP Akamai yang ada di daftar NICE

Semakin hari semakin banyak ISP Indonesia yang dipercaya Akamai untuk meng-cache konten-konten akamai , permasalahan timbul karena ISP seperti Idola/Lintas Arta, Telkom, Indosat dll mengadvertise blok IP Akamai Server mereka ke OpenIXP/IIX sehingga daftar nice.rsc juga akan menyertakan blok IP Akamai sebagai prefix lokal Indonesia padahal traffic Akamai yang di host di ISP Indonesia tsb tidak selalu dapat di download dari OpenIXP/IIX biasanya hanya outgoing routingnya saja via OpenIXP/IIX tetapi incoming routingnya tetap melalui pipa International kecuali para pelanggan Speedy atau Firstmedia "mungkin" mereka dapat mendownload konten Akamai secara khusus dari jaringan Speedy / Firstmedia .

berikut bukti akamai Idola/LintasArta di download melalui interface international sedangkan outgoingnya melalui interface lokal dan prefix 202.152.0.0/19 terdaftar di address-list = nice


Permasalahan ini sudah pernah saya tulis juga dalam artikel blog saya terdahulu: http://inetshoot.blogspot.com/2008/11/pemisahan-traffic-ke-ip-akamai-indosat.html , dimana kerancuan prefix Akamai di nice.rsc akan mengakibatkan limitasi bandwidth lokal dan international bisa tidak sesuai pada para pengguna mikrotik yang memanfaatkan nice.rsc

sehingga akan terjadi traffic international akan dianggap iix sehingga bandwidth International akan selalu mentok terpakai karena biasanya limitasi untuk iix akan lebih longgar / lebih besar bandwidthnya padahal umumnya bandwidth International yang di dapat lebih kecil dari pada bandwidth lokal Indonesia.

Untuk itu saya coba menangkap IP Akamai Server yang di advertise oleh ISP Indonesia di OpenIXP/IIX agar para pengguna nice.rsc bisa lebih lanjut mengkondisikan agar traffic Akamai tidak tercampur dengan mangle / queue traffic IIX, atau bisa jadi dikembangkan untuk memanipulasi agar traffic Akamai tsb di redirect ke proxy yang terhubung langsung dengan speedy atau firstmedia hehehe peace....

Langka1:
Buat /ip firewall layer7-protocol


Langka2:
Buat /ip firewall filter forward


Hasilnya akan terdapat pada address-list = "akamai-indonesia"


Minggu, 31 Oktober 2010

Petunjuk singkat menjadikan gmail sebagai smtp outlook

Seringkali anda harus bepergian ke berbagai tempat dan pada waktu akan mengirim email menggunakan email client seperti outlook kesulitan mengakses smtp, karena sebagian besar smtp dibatasi aksesnya hanya untuk jaringan internal perusahaan atau intranet atau hanya dapat diakses melalui jaringan ISP yang digunakan di kantor

Salah satu solusi praktis bagi anda yang sering bepergian adalah menjadikan smtp.gmail.com untuk outoging smtp di outlook agar tidak perlu melakukan perubahan konfigurasi smtp jika notebook dibawa ke tempat manapun selama ada akses Internet dan smtp.gmail.com port 587 di izinkan oleh firewall hotspot atau router dimana anda terkoneksi dengan Internet.

Petunjuk dari google dapat di lihat pada url berikut untuk outlook 2003

http://mail.google.com/support/bin/answer.py?answer=75291

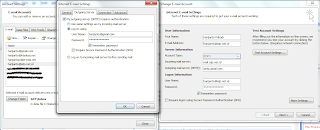
smtp.gmail.com bisa digunakan untuk outgoing mail server (smtp) semua mailbox yang kita miliki dengan klik “More Settings” pada account yang akan kita set , lalu pada tab “Outgoing Server” ceklist “My outgoing server (SMTP) requires authenctication” dan pilih “Log on using” masukkan username gmail yang anda daftarkan di gmail dan masukkan password gmail anda , agar tidak selalu meminta passwrod ceklist “Remember password”

Gambar dibawah adalah tampilan outlook 2007 tetapi harusnya tidak jauh berbeda dengan outlook 2003


Pada tab “Advanced” set “Outgoing server (SMTP) dengan port: 587” dan pilih “Use the following type of encrypted connection = TLS” lalu Klik “OK”

Dengan demikian maka notebook anda bisa mengirim email menggunakan SMTP : smtp.gmail.com dimanapun bisa mengakses Internet.

Kamis, 07 Oktober 2010

Langkah langkah upgrade firmware Switch Procurve 2650

Berikut adalah langkah-langkah untuk uprgrade firmware switch HP Procurve 2650

Untuk melakukan upgrade firmware siapkan:

1. Kabel konsol
2. USB to Serial untuk notebook baru sudah tidak menyediakan port serial
3. Kabel UTP untuk proses upload / download OS dari ke switch
4. TFTP Server bisa di download dari solarwind: http://www.solarwinds.com/register/registration.aspx?program=52&c=70150000000CcH2&INTCMP=ILC-TFTP_Top_DL
5. Download putty.exe untuk telnet, ssh dan serial koneksi : http://www.putty.org/

Langkah1

Download firmware switch dari:

http://h10144.www1.hp.com/customercare/support/software/summarypages/h-j4900-c.htm

simpan di direktori misal :

C:\Users\Harijanto\Downloads\2600-Software-H1083\

Langkah2

Jika switch belum di konfigure IP nya pasang kabel konsol + usb to serial , lalu gunakan aplikasi hyperterminal atau putty.exe , jangan lupa nyalakan switchnya juga.

Untuk mengetahui di COM berapa kabel serial tersebut terpasang caranya cek di device-manager , cara paling praktis klik kanan di my computer lalu pilih manage


di contoh ini usb to serial di com13

setelah mengetahui di com berapa jalankan program putty.exe


pilih serial dan ketik com13 lalu klik Open


enter -> enter maka putty akan mendetek kecepatan baud-ratenya kalau sudah bisa komunikasi makan akan muncul CLI dari switch procurve tersebut


ketik : sh run
maka akan muncul konfigurasi switch tersebut, di contoh ini switch belum di beri IP statik , untuk itu setup ip statik di vlan1 caranya ketik:

config t
vlan1
ip address 192.168.0.1 255.255.255.0

untuk menyimpan konfigurasi ketik:

write mem


Langkah 3

kemudian set ip 192.168.0.2 mask 255.255.255.0 di interface ethernet pada notebook seperti berikut ini:


setelah notebook diset ip 192.168.0.2 netmask 255.255.255.0 maka harusnya dari notebook sudah bisa ping ke 192.168.0.1


Langkah 4

lalu aktfikan tftp solarwind , arahkan direktori ke path dimana file firmware / os switch berada dengan cara klik file->configure->storage klik browse arahkan ke direktori dimana file firmware / os berada kalau sudah klik OK


jangan lupa klik "Start" agar tftp server dijalankan


Langkah 5

di konsole putty ketik: menu maka akan muncul menu dan pilih "Download OS"


masukkan ip tftp server dalam contoh ini: 192.168.0.2 dan nama file dalam contoh ini: H_10_83.swi , kemudian pilih execute


jika semua benar maka proses download os akan dilaksanakan


Jika sudah selesai maka akan ada pesan sbb:


selanjutnya switch harus di reboot, jika tidak boot otomatis ketik: boot, maka switch akan melakukan proses reboot


dan jika sudah berhasil maka kalau di : sh run , maka tampilannya aka sbb:


di sini bisa dilihat bahwa firmware/os switch sudah menggunakan versi baru yang tadi di download

Selamat mencoba

Jumat, 10 September 2010

Perbedaan Pseudo Bridge dengan WDS

Setelah mencari-cari penjelasan pseudobridge vs WDS akhirnya kutemukan artikel ini:

http://forum.mikrotik.com/viewtopic.php?f=13&t=41165

psudo only allows one active mac address to be behind the client.

so if you have a CPE with a customers router or single PC behind it, it works great. If the customer plugs in a switch and tries to hook up two computers that try to get online, it won't work as expected for them, and only one device at a time can receive packets.

Additionally it has less overhead than WDS, and reconnects to the AP faster in the event of a disconnect (WDS has to connect once regular, probe the AP to determine if WDS is supported, then reconnect as a WDS connection), Plus the option of turning off default forwarding on the AP works (To accomplish the same when using WDS you have to get creative and use a bunch of bridge rules).

For a backhaul, you should really avoid using WDS (or psudobridge), you should be using regular station and bridge mode, with no other devices connected, and then routing the data across a /30 subnet, preferably using OSPF (and a redundant path available), but static routing can be used if necessary.

Thanks Brian:
-Brian

http://www.thehostingnews.com
gawkwire.com
sailingit.com

Penjelasannya kurang lebih sbb:

Kalau pake pseudo bridge hanya satu mac-address yang bisa aktif dibelakang access-point-client (APC) , alias di sisi router distribusi yang arp-tablenya hanya bisa kenal satu mac-address router sisi clientnya (semoga ngerti yang saya maksud)

jadi kalau Client Permissive Equipment (CPE) hanya dihubungkan ke satu router client menggunakan pseudobridge akan sangat bagus, tapi kalau CPE dihubungkan ke switch lalu ada lebih dari satu komputer maka hanya salah satu komputer saja yang arp nya masuk di arp-table router ISP , jadi kalau clientnya gak punya router dari CPE langsung ke switch lalu masuk beberapa komputer sisi APC harus dijadiin station-wds

Tapi dijelaskan oleh Brian, bahwa pseudobridge overheadnya lebih kecil dari WDS, alias lebih efisien dibanding WDS , dan pseodobridge kalau disconnect , connect lagi ke AP nya lebih cepat dibanding WDS.

Untuk backhaul kata Brian, sebaiknya menghindari pakai WDS tapi pakai mode station dan bridge biasa lalu lakukan routing per /30 subnet bisa pakai ospf atau static routing.

Semoga penjelasan ini bermanfaat

Salam
Harijanto P.
http://htsolusi.net
http://pt-pda.net